甘肃省网站建设_网站建设公司_支付系统_seo优化
包
包提供了一种共享不同构造的附加方式。他们的行为与VHDL包。包可以包含函数、任务、类型和枚举。的语法包是:
package package_name;
items
endpackage : package_name
最终的package_name不是必需的,但它使代码更易于阅读。包是import命令在其他模块中引用。以下是语法:
import package_name::item or *;
import命令必须包括要导入的包中的项,或者指定整个包
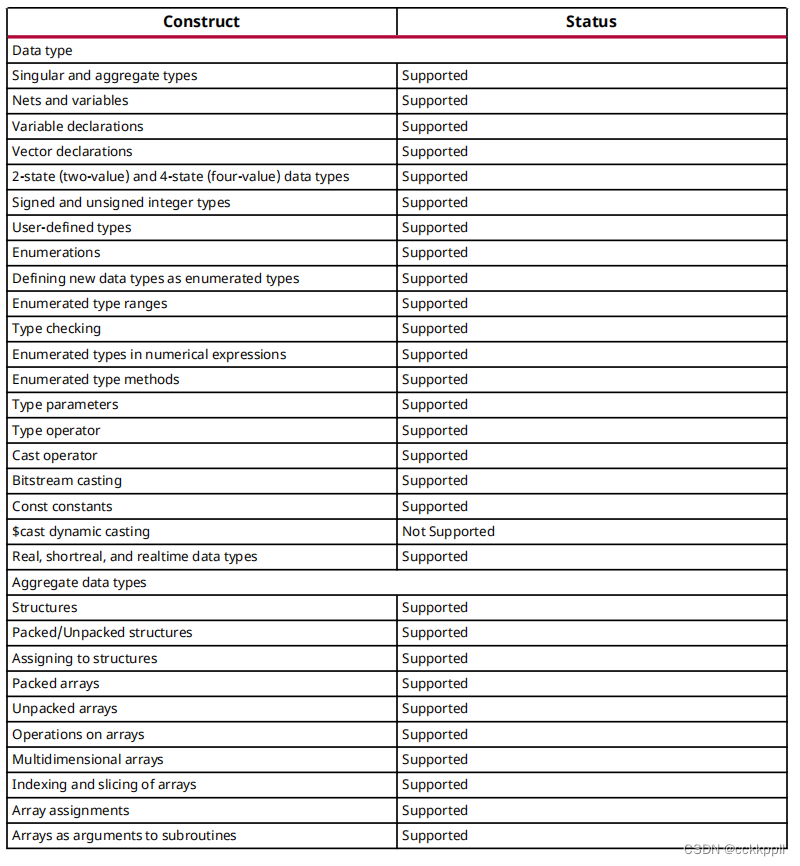
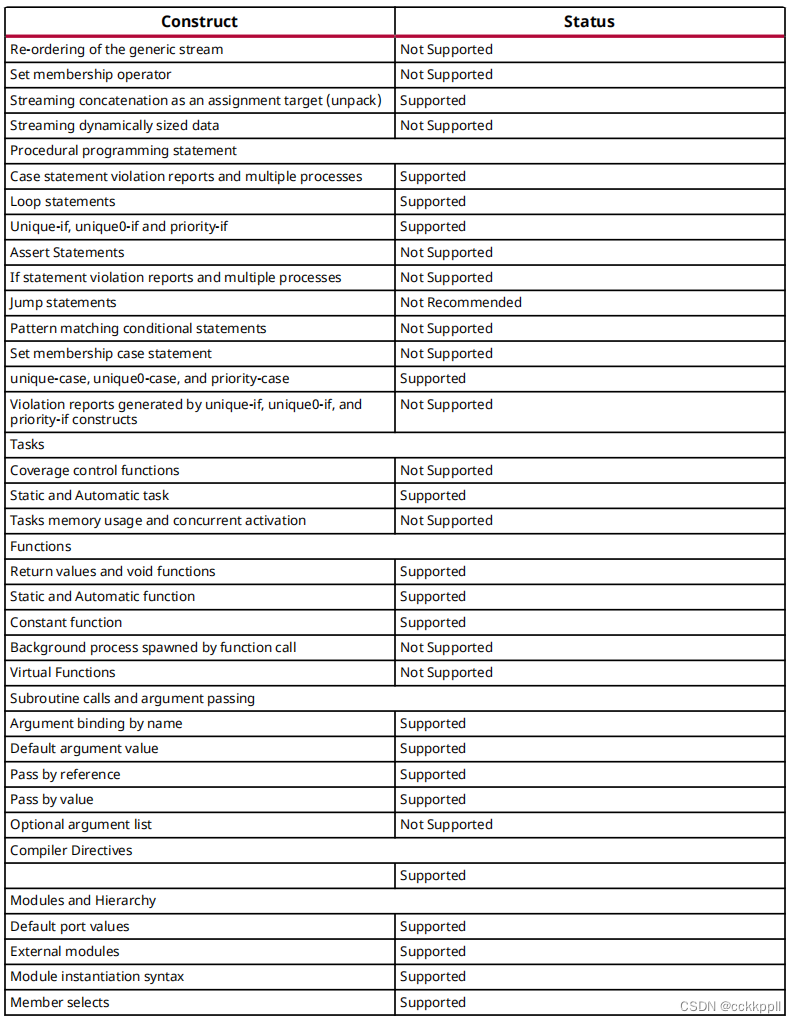
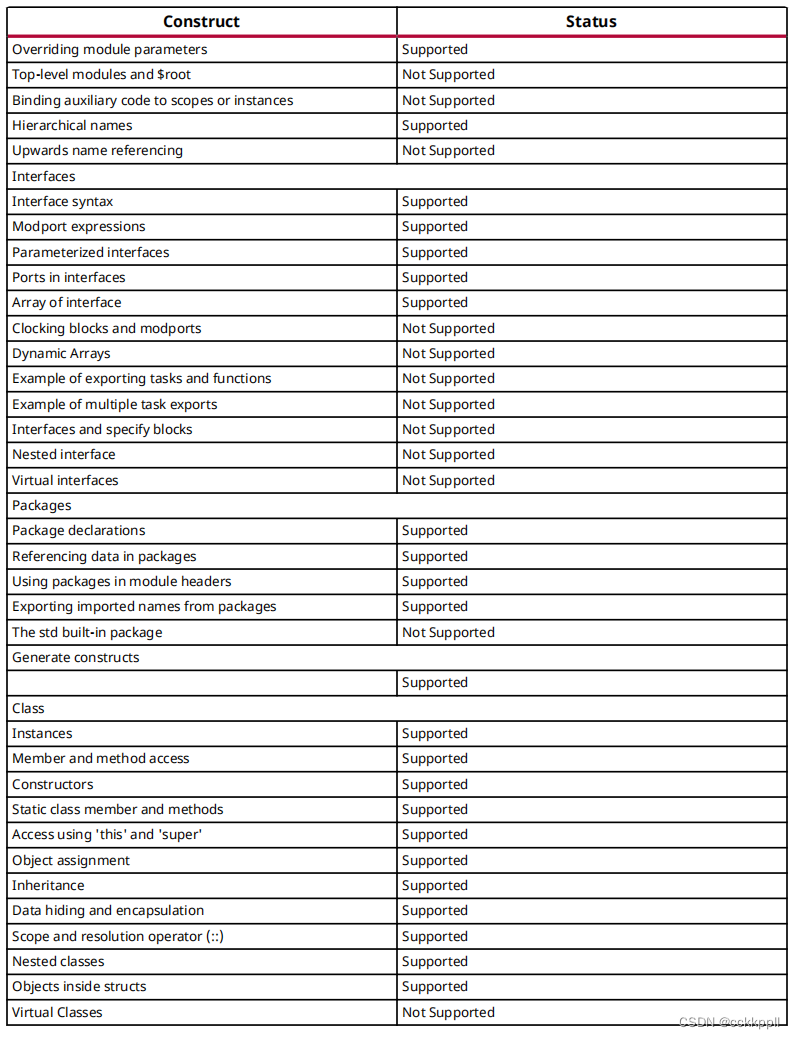
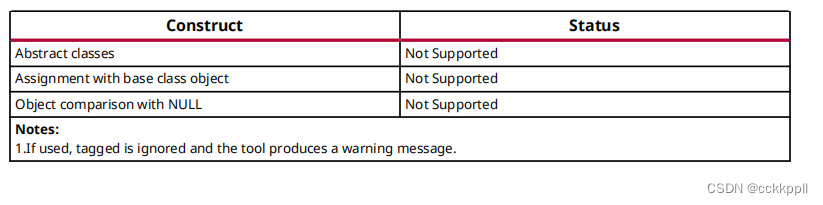
SystemVerilog构造
下表列出了SystemVerilog构造。不受支持的构造为灰色阴影。