澄迈县网站建设_网站建设公司_前后端分离_seo优化
1. 速率
速率即数据率(data rate)或称数据传输速率或比特率
单位时间(秒)传输信息(比特)量
计算机网络中最重要的一个性能指标
单位:bps、kbps、Mbps
k = 10^3、M = 10^6、G = 10^9
速率往往是指额定速率或标称速率,理想数据传输速率
2. 带宽
- “带宽”(bandwidth)原本指信号具有的频带宽度,即最高频率与最低频率之差,单位为Hz
- 网络的带宽是指数字信道所能传输的最高数据率,单位为bps
- 常用的带宽单位:kb/s、Mb/s、Gb/s、Tb/s
3. 延迟/时延(delay)
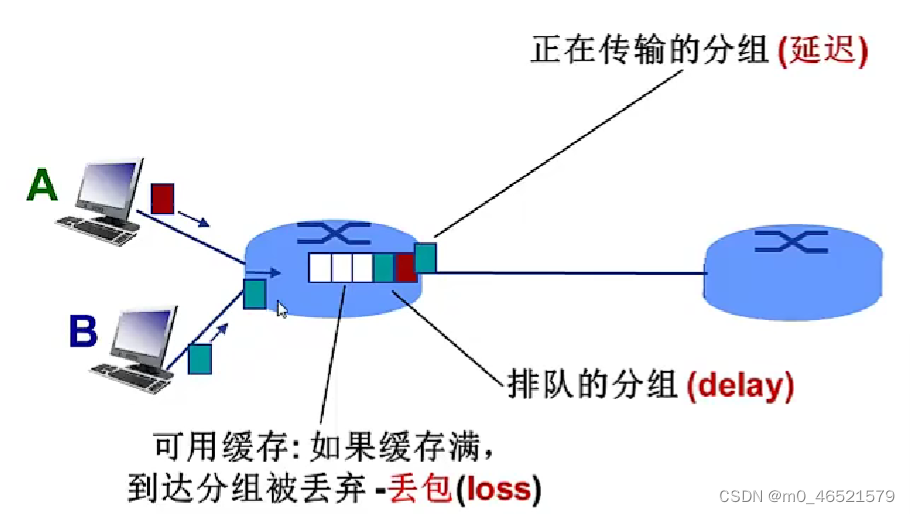
分组交换为什么会发生丢包和时延?
分组在路由器缓存中排队,分组到达速率超出输出链路容量时
分组排队,等待输出链路可用
四种分组延迟:
(1)节点处理延迟(d_proc):差错检测;确定输出链路;通常小于ms
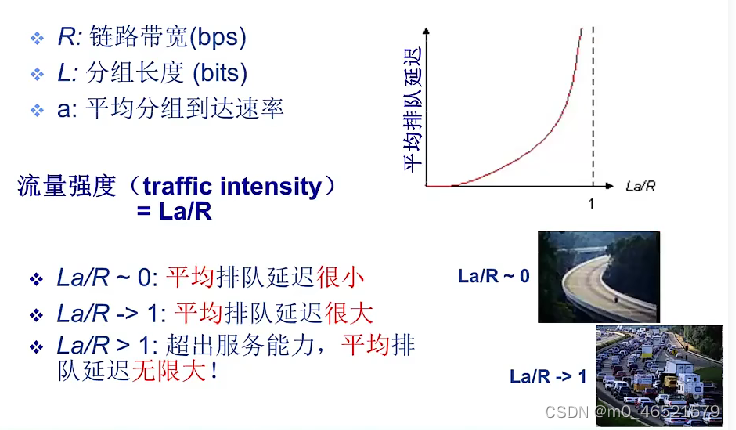
(2)排队延迟(d_queue):等待输出链路可用;取决于路由器拥塞程度
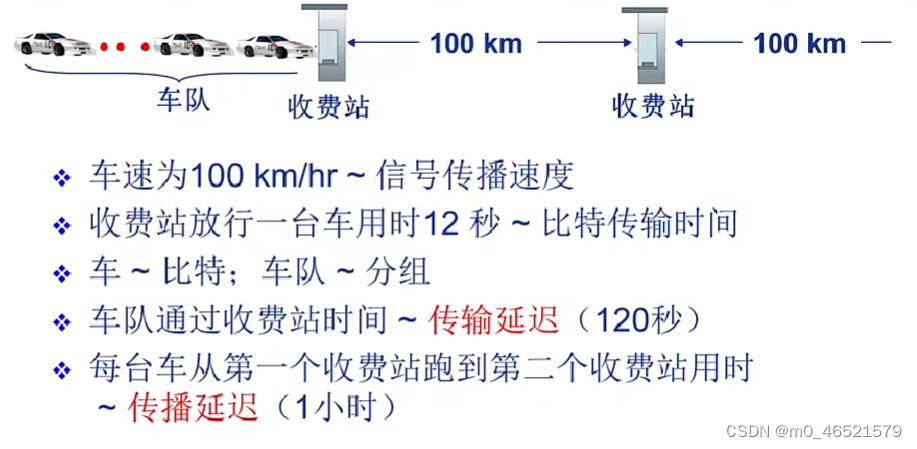
(3)传输延迟(d_trans):分组长度(bits)、链路带宽(bps)、d_trans = L/R
(4)传播延迟(d_prop):物理链路长度、信号传播速度

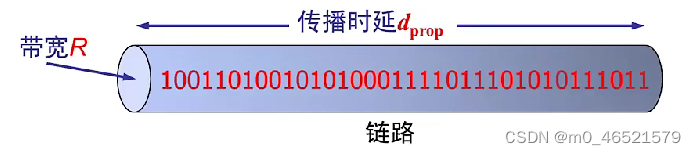
4. 时延带宽积
时延带宽积 = 传播时延 * 带宽 = d_prop * R
链路的时延带宽积:以比特为单位的链路长度
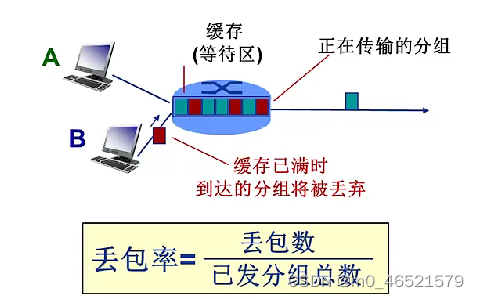
5. 分组丢失(丢包)——丢包率
- 队列缓存容量有限
- 分组到达已满队列将被丢弃
- 丢弃分组可能由前序结点或源重发
6. 吞吐量
表示在发送端和接收端之间传送数据速率
即时吞吐量、平均吞吐量
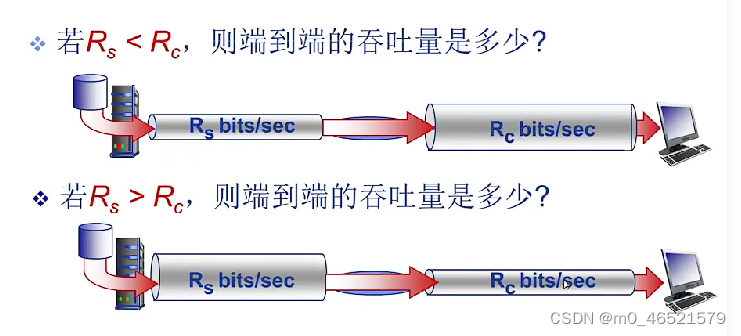
端到端路径上,限制端到端吞吐量的链路