南充市网站建设_网站建设公司_展示型网站_seo优化
SimpleDateFormat是一种比较常用的时间类,可以实现对时间按照一定的字符串格式进行处理。
·DateFormat类的作用
把时间对象转化成指定格式的字符串。反之,把指定格式的字符串转化成时间对象。
DateFormat是一个抽象类,一般使用它的的子类SimpleDateFormat类来实现。
【示例8-15】DateFormat类和SimpleDateFormat类的使用
import java.text.ParseException;
import java.text.SimpleDateFormat;
import java.util.Date;
public class TestDateFormat {public static void main(String[] args) throws ParseException {// new出SimpleDateFormat对象SimpleDateFormat s1 = new SimpleDateFormat("yyyy-MM-dd hh:mm:ss");SimpleDateFormat s2 = new SimpleDateFormat("yyyy-MM-dd");// 将时间对象转换成字符串String daytime = s1.format(new Date());System.out.println(daytime);System.out.println(s2.format(new Date()));System.out.println(new SimpleDateFormat("hh:mm:ss").format(new Date()));// 将符合指定格式的字符串转成成时间对象.字符串格式需要和指定格式一致。String time = "2007-10-7";Date date = s2.parse(time);System.out.println("date1: " + date);time = "2007-10-7 20:15:30";date = s1.parse(time);System.out.println("date2: " + date);}
}
执行结果如图8-16所示:

图8-16 示例8-15运行效果图
代码中的格式化字符的具体含义见表8-2:

时间格式字符也可以为我们提供其他的便利。比如:获得当前时间是今年的第几天。代码如下:
【示例8-16】时间格式字符的使用
package com.bjsxt.inputstream;import java.io.FileInputStream;
import java.io.FileNotFoundException;
import java.io.FileOutputStream;
import java.io.IOException;public class TestCopyFile {public static void main(String[] args) {//数据源是文件FileInputStream fis=null;//目的地FileOutputStream fos=null;try {fis = new FileInputStream("D:myCode/a.txt");fos = new FileOutputStream("D:/myCode/target.txt");/* int b=0; //用于存储读到的字节,中转站while((b=fis.read())!=-1){//写入文件fos.write(b);}*/byte[] buf=new byte[1024];int len=0;//用于存储每次读到的字节个数while((len=fis.read(buf))!=-1){fos.write(buf,0,len);}} catch (FileNotFoundException e) {e.printStackTrace();} catch (IOException e) {e.printStackTrace();}finally{//关闭try {if(fos!=null){fos.close();}} catch (IOException e) {// TODO Auto-generated catch blocke.printStackTrace();}try {if(fis!=null){fis.close();}} catch (IOException e) {// TODO Auto-generated catch blocke.printStackTrace();}}}}
import java.text.SimpleDateFormat;
import java.util.Date;
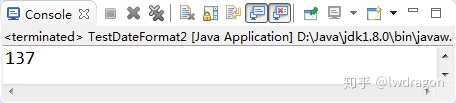
public class TestDateFormat2 {public static void main(String[] args) {SimpleDateFormat s1 = new SimpleDateFormat("D");String daytime = s1.format(new Date());System.out.println(daytime);}
}
执行结果如图8-17所示:
------------百战卓越013天